Pages

Sunday, December 23, 2012

The Capon Caper

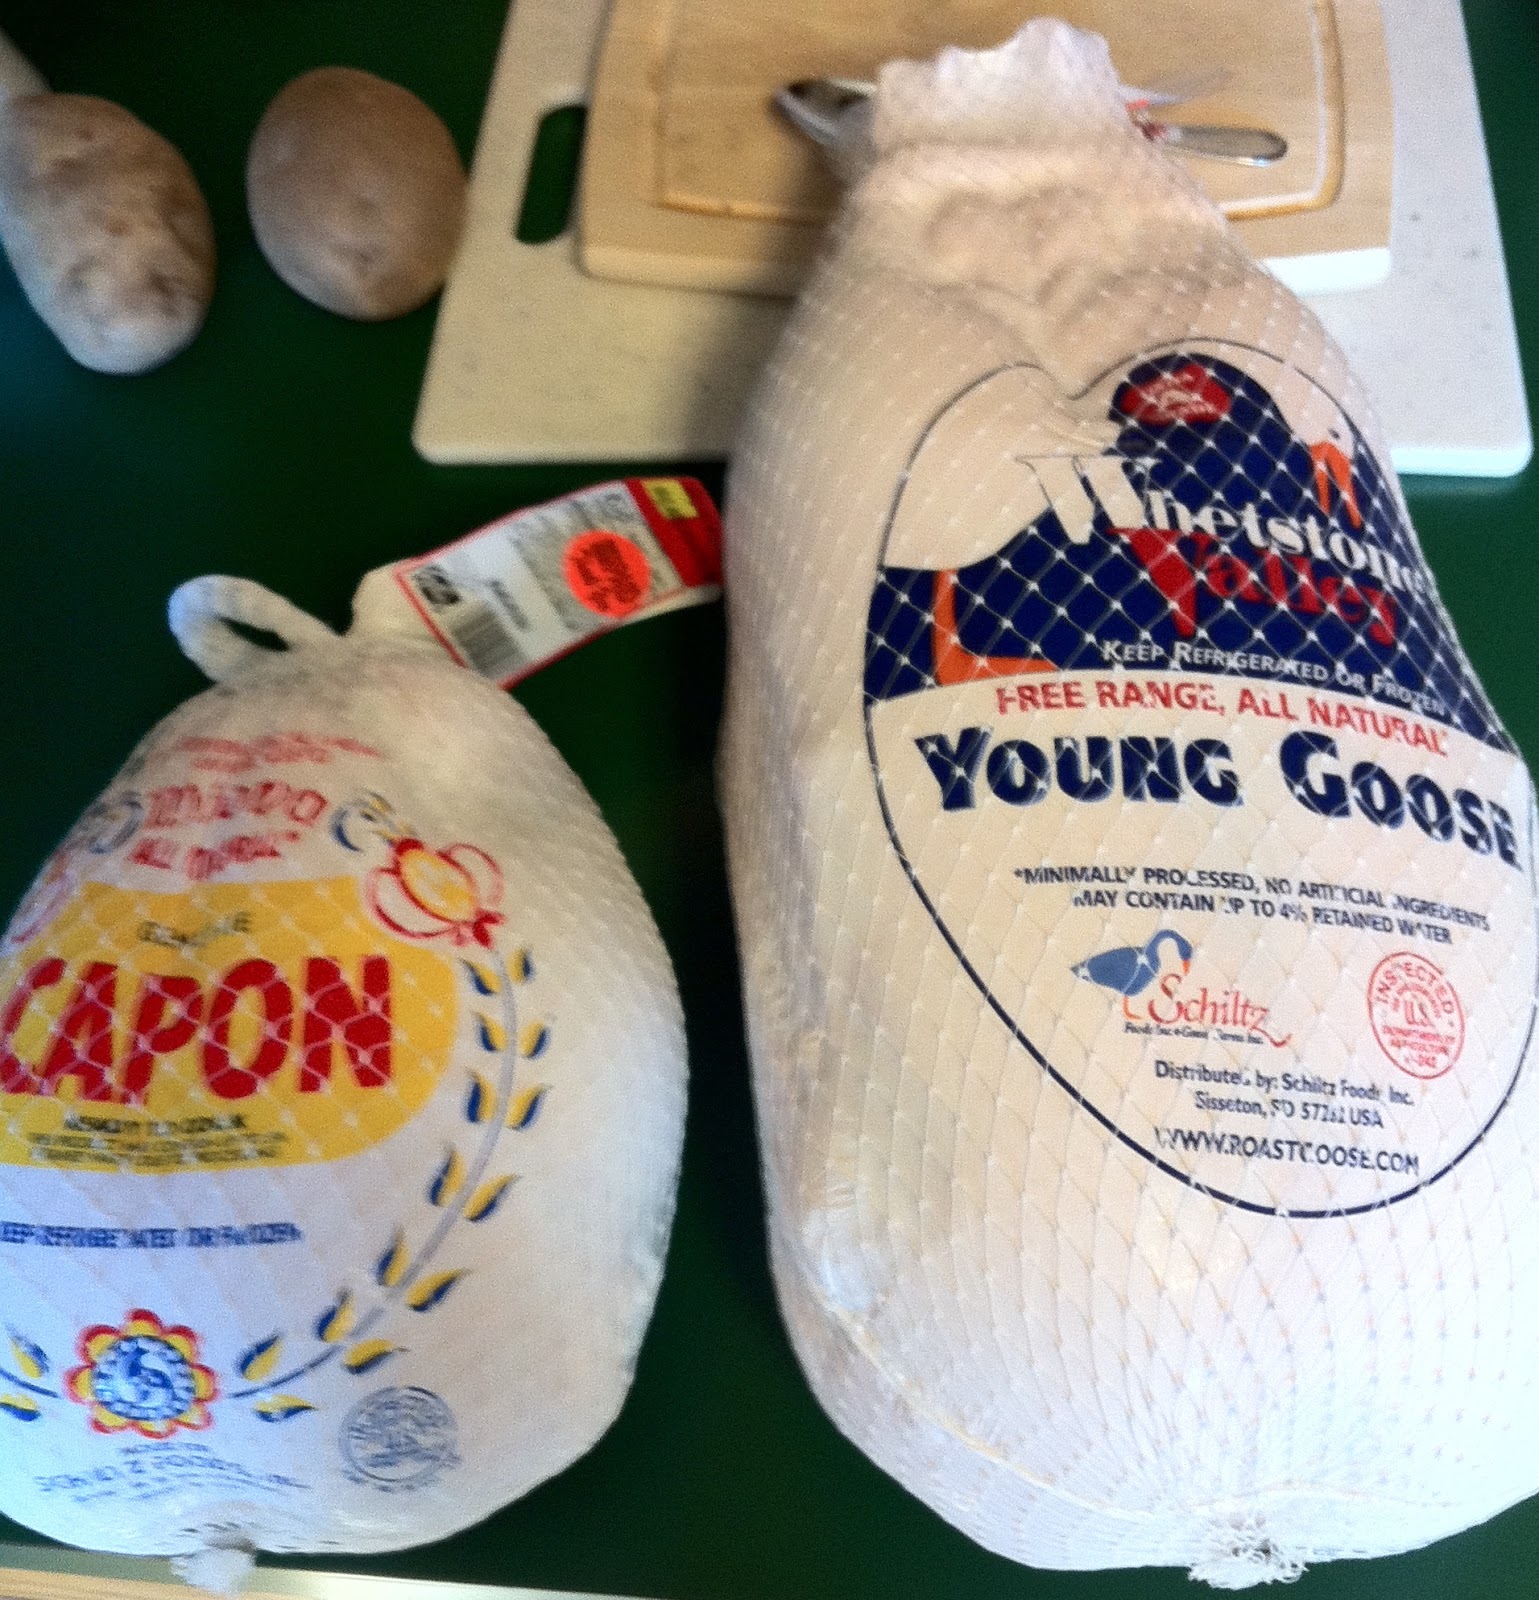
The grocery store I normally shop at (Big Y) carries several items during the holiday season that are typically not available without special order during the rest of the year. Just before Thanksgiving I asked an eager young lad (20 something) at the butcher counter if they had any geese. He headed off the back and a few minutes later returned with a nice 14 pound goose - AND a 6 lb capon, telling me "I thought you might also like one of these!"

Two thoughts ran through my mind - what's a capon? ... and nice upsell kid!


So I leave Big Y with a $70 dollar goose and a $24 bird that I need to Google in order to find out what it is! I am not really sure why I did not Google it in the store before I bought it, they have free wifi. I really did not realize that I had bought a $24 chicken until I got home! Now my biggest question was - Does it taste like chicken?

I figured I should probably take a look at some capon recipes just to find out if there is anything different you need to do to a capon. Removing various parts was likely not going to be an issue as those parts had already been removed, but one never knows what other steps might be necessary. Interestingly, Googling capon recipes returns very few results but "Damn You Auto Correct" tries very hard to change capon to Capone, so I figured I had a gangster chicken on my hands (or at least an Angry Bird) and all I really needed to do to cook it check for weapons and if none were found, treat it like a chicken.

So here is my rendition of Roasted Capon.

Ingredients:
  • 1 capon (duh) - Mine was about 6 pounds.
  • 1 lemon (quartered length ways)
  • 1/4 cup (1 stick) of unsalted butter softened (room temperature)
  • 1 yellow onion (quartered length ways)
  • 4 large cloves of garlic (two chopped fine, two smashed)
  • About 10 large Sage leaves (6 coarsely chopped, 4 whole)
  • Kosher salt
  • Fresh ground black pepper


Process:

Allow your capon to sit out until at room temperature. Preheat the oven to 450. Remove any excess fat from around the body cavity openings, wash the capon inside and out with cold water, thoroughly pat dry inside and out, and then generously season both the cavity and entire outer body with salt and pepper. This is a good time to check for weapons and recover the goodie bag of giblets stuffed inside which can be used to make gravy. I personally don't go for the giblets gravy, but the neck can be added to the pot of chicken stock you make the next day using the post capon feast carcass.

Squeeze out a couple of tablespoons of lemon juice from one or two of the wedges and reserve. Stuff the capon with the onions, lemon wedges (even the squeezed ones), smashed garlic, and whole sage leaves; then truss the capon to hold in the stuffed ingredients and hold its shape while cooking.

Combine the butter, chopped sage, chopped garlic, and reserved lemon juice in a small bowl. Spread this mixture all over the outside of the capon. There is no getting out of getting your hands messy here so ensure the kitchen sink pipes are queued up with hot water and that you have soap nearby.

Using a roasting pan with rack, pour about 2 cups of water into the bottom of the pan and place the capon breast down on the rack. Roast in pre-heated oven for about 20-30 minutes, then remove it from the oven, turn it over (breast up), baste with the juice from the pan, and then lower the oven to 375 and return the capon to the oven.

Let it roast at 375 for about an hour, or when the temperature in the thigh reads 155-160 with an instaread thermometer, basting at least once during this time and adding water to the bottom of the pan if needed.  When the temperature is 155 - 160, turn the oven back up to about 450 to crisp the skin (about 10-15 minutes).

And that's it - you have a beautifully roasted capon with some great drippings in the pan for gravy!


So back to the question I know you are dying to know the answer to - Does it taste like chicken?


Yes, yes it does, but a damn good chicken! I'm not going to go out an spend $24 every time I want roast chicken, but for the holidays or special occasions I will do it again. 

Recommended sides:
  • Mashed potatoes with gravy made from the drippings.
  • Oven roasted Brussels Sprouts with Pancetta.

Monday, December 17, 2012

Apple Nut Bread

Shortly after Thanksgiving I was in still in the holiday food mood and made a couple of loaves of Cranberry Nut Bread which turned out great. I started thinking Apple Nut Bread would be good to, so and went out in search of an Apple Nut Bread recipe. I was dismayed by what I found! When I was thinking Apple Nut Bread, I envisioned apple pie with big chunks of apple, but all the recipes I found had you murdering that poor apples. Some had you mashing the apples and some had you grating the apples, but none of them offered you that large tart bite fruit that you get with an apple pie (and cranberry nut bread if done right).

The only way to solve this problem was invent my own! So here it is, my original contribution to Internet cuisine.

Note: the proportions here are for one 9x5 loaf, but you may want to double it because you only really need 1-1/2 apples for one loaf (or just eat half an apple while cooking).

For the Bread:
  • 2 Granny Smith apples
  • 1/2 lemon
  • 2 cups of flour
  • 1 cup of sugar
  • 1 1/2 tsp baking powder
  • 1/2 tsp baking soda
  • 1/2 tsp of salt
  • 1/2 tsp of cinnamon
  • 1 cup of chopped walnuts
  • 2 TBLS of butter, melted
  • 1 egg (beaten)
  • 3/4 cup of apple juice
Peel, core, and slice the apples into 8 wedges, each wedge cut in half across the middle. You only need 1-1/2 apples, so you can eat half of one. Place the apples in a large bowl, sprinkle with 1/2 tsp of cinnamon, squeeze 1/2 of a lemon all over it, and then toss to coat all of the apple chunks.

Place all the dry ingredients into a large bowl and vigorously whisk with a wire whisk to evenly distribute all of the ingredients. What you are doing here is essentially the same as sifting together the dry ingredients, but you really do not need a sifter, just make sure everything is evenly distributed.

Using a heavy wooden spoon, mix in the apple juice and melted butter until evenly distributed, then add your egg and continue to mix.  (Tip - whisk the dry ingredients first so you can use the same whisk for the egg).

Once the wet and dry ingredients of fully mixed, fold in the apples and nuts. This will be a very think batter. Spoon it into a greased 9x5 loaf pan and bake at 350 for about 45-50 minutes (until a toothpick inserted in the center comes out clean). After baking let it cool in the pan for about 5 minutes, then remove it from the pan an allow it to fully (well .. mostly) cool before glazing.

For the Glaze:
  • 2 TBLS of butter
  • 2 cups of sifted confectioners sugar (you can whisk this also, but not to vigorously unless you want to breath it :)
  • 1/4 tsp of cinnamon
  • 3-4 TBLS of apple juice
Melt the butter in a small sauce pan. Remove from the heat stir in the confectioners sugar and cinnamon - this will form a thick glob. Spoon in two TBLS of apple juice and continue mixing, adding additional spoons of apple juice to get it to a consistency that will poor and cover the bread without all of it running off. (a little thicker than ketchup).

I would have no problem trowing down against Bobby Flay with this one!


Thursday, December 13, 2012

Baklava is Better than Twinkies

It's that time of year when inevitably you are going to end up needing to bring some type of food to a social gathering of friends, coworkers, or family.

With Hostess out of business, my old trick of arranging Twinkies on a plate is out! While I'm sure that now Twinkies would be a bit hit at just about any gathering (except one at a union hall), I only have 20 left and would have to go all the way to Canada to get more, so I had to come up with a plan B. So what is just as good as a Twinkie? ... Baklava (aka Honey Bombs)!

You do not see Baklava at social gatherings often because while it is not "hard" to make, it is VERY labor intensive. Maybe I am just slow in my old age, but from start to finish it takes me about 3 hours with 2.5 of that being "active" time - But oooh is it so worth it. Go out and buy the finest baklava from the best deli in town and compare it to homemade. There is no comparison - Why? Because of profit margins. One piece of baklava at my local deli is $3.50, and to get it down to that price they have to cut a lot of corners - less nuts, less butter, less honey, less phyllo ...you get the idea.

Essentially I use Michael Symon's recipe (http://www.foodnetwork.com/recipes/michael-symon/baklava-recipe/index.html), The only changes I make are that I use crushed Carr's water crackers instead of zwieback, and 1 more TBLS of lemon juice (3 instead of 2).
  • 32 sheets of phyllo dough
  • 1 pound of unsalted butter
  • 1 pound of walnuts (chopped)
  • 1 cup of well crushed Carr's water crackers
  • 1/2 tsp of cinnamon
  • 8 oz of honey
  • 3 cups of sugar
  • 3 TBLs of lemon
Mix the chopped nuts, cinnamon, and cracker crumbs in a large bowl.

Now here comes the "hard" part - assembly. Start by brushing a 9x13 glass dish with melted butter, and then create the bottom with 10 layers of phyllo dough, brushing each layer with butter before laying the next. Then spread 1/4 of your nut mixture followed by 4 more layers of dough (each brushed with butter of course), and repeat this sequence until you have used all the nut mixture. Then top it all off with 10 more layers of dough. What you end up with is:
  • 10 layers of dough
  • nuts
  • 4 layers of dough
  • nuts
  • 4 layers of dough
  • nuts
  • 4 layers of dough
  • nuts
  • 10 layers of dough
  • And butter all over the place - note the parchment paper :).


This is important - Cut it before you bake it (350 for about 45 min). If you attempt to cut it after it is baked, the top layers will crumble!

Once it is in the oven, you get a 15-20 minute break!

You want to start to make the syrup about 30 minutes before it comes out of the oven because you are trying to time it so both the syrup and the baked baklava have a 5-10 minute cool down period before the committing to each other - and this is a life long commitment.

For the syrup, combine the honey, sugar, and 1 1/2 cups of water in a sauce pan and bring to a boil stirring constantly (if you don't stir, this will boil over like a volcano - trust me on this). Once it comes to a boil, reduce the heat to simmer for about 20 minutes. This is the most interesting part. Honey by its nature has a lot of impurities in it so as it simmers an odd looking scum will form on the top - the color and consistency of the scum will depend on the brand and probably batch of honey. Skim this off as it forms. When the scum is gone and new scum stops forming (about 20 minutes) add the lemon juice and let it simmer a couple of more minutes.

By now the baklava should be baked. Let both the baklava and syrup cool for about 5 to 10 minutes, then pour the syrup all over the top of the baklava. Your Done! But NO you can't have any. It needs to sit for several hours (over night) before it is ready - sort of sucks after all that work!  


Now all that is left is getting it ready to travel. This is not too hard, but you do have to remember to take the cat out of the tray before loading it up with the baklava. Time saving hint - if you have never posted the picture of the cat sleeping in the tray on Facebook, then you don't need to wash it because nobody will know!


Tuesday, December 11, 2012

Fast Food Monday

Angie and I have taken to calling Monday – Fast Food Monday. This habit started because it is the one day of the work week where we both get off work about 5 and can actually have dinner together but as it is Monday and we have both worked all day, neither of us really wants to cook.

Periodically Angie makes huge batches of spaghetti sauce and freezes it in one meal portions. For a very long time, Fast Food Monday = Spaghetti. Getting a little tired of spaghetti every Monday, I started to toss in a periodic Shrimp Scampi on Mondays, which we consider Fast Food because cooking time is only 9 minutes and even with prep the scampi comes together in about 20 minutes.

I’m getting real tired of pasta so last night I decided to change it up some – soooo, what can I throw together in less than 30 minutes that does not come out of a can or box? Solution – Quesadillas!

OK, you sort of have to think ahead on this one.
  • Do I have a chicken breast in the freezer?  Yup – take that out before noon! 
  • Guacamole – you can’t just make it and eat it – it needs to set for a while for the flavors to blend! Take 10 minutes during your mind day “lunch” break and slap some together. 
If you do these things – then after 5:00, you can have Fast Food Quesadillas!

I won’t call this a recipe, but here is my process:

Guacamole:
  • 2 ripe avocados
  • 2 TBLS of small-diced red onion
  • 1 clove of garlic finely minced
  • ¼ tsp of kosher salt
  • ¼ cup of chopped Italian parsley (I don’t really like cilantro but that would be what most people use)
  • 1 Lime
Scoop out the avocado into a bowl; add the onion, garlic, salt and parsley/cilantro; squeeze in the juice from the lime; then mash it all together with a fork until you get it to the consistency you want.
  • Note - Consistency of the guacamole will likely depend on what kind of day you are having so far. On a good day it is nice and chunky. On a bad day it could get pretty smooth because mashing it is good anger therapy.  
Quesadillas (feeds 2)
  • 1 boneless, skinless chicken breast
  • A generous pinch of red pepper flakes
  • Kosher salt (to taste)
  • Black pepper (to taste)
  • Shredded Mexican Cheese blend
  • 1 tomato – diced
  • ¼ (about) of a diced red onion
  • 1 14-oz can of black beans.
  • 3 large flour tortillas
  • Lite olive or grape seed oil (don’t use EVOO it will smoke and taste like my mother made it, and you don't want that!)
Cover the bottom of a small skillet with oil (about 2 TBLs), add the red pepper flakes, and place over medium to medium high heat. Once the pan is hot, generously season the chicken breast with salt and pepper, toss it in the pan, and let it cook (turning once).

Important – Make sure the skillet you use is designed for searing. The searing brings a lot of flavor to the party. Most non-stick cookware does not sear well, so use stainless or a sear rated non-stick such as Calphalon Unision.

While the chicken is cooking, dice the tomato and onion, and heat the beans in a small sauce pan.

The chicken is finished when the center reads 160 with an instaread thermometer (no higher, it will continue to cook while it rests). It should have a good sear on both sides. Take it out of the pan and let it rest 5 minutes. Once rested, slice it diagonally along the bias into approximately ¼ wide strips.

Now that you have everything sliced and diced, lightly brush 1 of the tortillas with oil and place it oil side down in a large non-stick skillet. Generously sprinkle cheese over the entire tortilla surface, and then arrange the sliced chicken, diced tomatoes and onions, and black beans over one half.

Fold the cheese only half over the top of the covered half, let it cook on the first side for a couple of more minutes, then flip it and cook the second side for another 2 minutes. Remove to a cutting board and cut into three triangles. Repeat the process with the remaining tortillas and you end up with 9 Quesadillas in under 30 minutes – and these are better than any quesadillas I have ever had from hotel room service!


With just Angie and I, this feeds us both with one or two left over for lunch the next day.

Sunday, December 9, 2012

Oven Mitts

Not that I keep track of such things, but I think the oven mitts that we have are well over 5 years old, maybe older. I am not sure what the average service life of an oven mitt is, but considering how many times I have burned my hands while wearing these oven mitts I am sure these are long past it. Imagine what fun it was taking a 14 pound goose out of a 400 degree oven on Thanks Giving with expired oven mitts!

So it should not be a big deal to go out and buy new ones – or so you would think.

The first place I think to look is the grocery store – you know that aisle where you can buy basic kitchen gadgets. Well they have one huge international orange silicon variety that look more appropriate for nuclear/biological clean-up. I do not think my stomach could handle seeing those every morning before the coffee is ready. So let’s try Walmart – really all of them have Christmas themes? No, I am not looking at Santa all year long. OK, Kohls is right around the corner – they have a Foodnetwork section. Come on Kohls, you have got to be kidding me - $15 a piece? That’s $30 if you have two hands!

Thank you Amazon.com! $16 for TWO and free shipping!  http://www.amazon.com/gp/product/B008RGM5TS/ref=oh_details_o00_s00_i00

I read an article just yesterday that stated if Congress passes the Internet Sales Tax rider stuck buried in the Defense Authorization Bill it will encourage people to shop local support local businesses. Yea right – do you know how much gas I burned NOT finding oven mitts at a local business?

Welcome to My Blog

Welcome to my new blog – The Tin Chef

I have been thinking about starting a blog for a long time but I figured it needed to have a focus/topic that I enjoy and know something about, otherwise it would just become the ravings of a mad man and let’s face it, you really do not care about my political or religious views. So, I could talk about my work – Instructional Design, but hey that’s WORK and this blog is supposed to take me away from work! I could talk about submarines, but I really want to keep this SFW (Safe for Work) and conversations about submarines always go in one of two directions – highly technical and classified, or NSFW (Not Safe For Work). After much shallow thought, I finally came up with a topic that interest me, won’t piss people off, and some people might even want to read – Cooking.

Let me give you a brief background on how my passion for cooking happened.  For the first 52 years of my life, I could boil, fry, and scramble an egg; and even bake a cake – as long as it came out of a box. In 2010 I was diagnosed with prostate cancer, which is really no big deal – or so I thought at the time. Well yes, prostate cancer is curable – if the cure does not kill you. Long story short, the “cure” landed me in Intensive Care with septic shock and acute kidney failure; and honestly for the first and only time in my life I did not care if it was over. Then laying there in the ICU I was flipping through the channels and came across Iron Chef. It looked kind of interesting so I stopped clicking and watched. By the time it was over I wanted to get better so that I could go home and try that!

So here I am two years later, and I can actually say “I can cook” with a straight face. The journey I have taken in the kitchen over the last two years has been  a blast and now I would like to share with you, some of the joy cooking as brought me … whoever you are.